Showing posts with label bike repair. Show all posts

Wednesday, July 16, 2008

Bike Overhaul (Step 2)


The plan is to remove some high-quality components from an old mountain bike that someone donated to Steph (but is too small for her) and replace the cheap components on my mountain bike with them.

Time: 2 hours

Cost: $40 (for new cables and housings and new grips)

Witch-gear: Repair stand, torque wrench, headset wrenches, pedal wrench, bike chain tool, allen wrenches, socket set, needlenose pliers, dry degreaser, dry lubricant, synthetic grease

Level of Difficulty: (What's with the saws?)

What I Learned: 1) Bike cable and housing are very hard to cut. I tried older pairs of metal shears and diagonal nose cutters, but the only tool that worked was the cutters on my newer pair of needlenose pliers. (Even then, they really had to be squeezed.) and 2) Before you grab your chain tool and pop any old pin out of the chain to remove it, research how your particular chain is supposed to be removed. I popped a pin all the way out of my bike's chain, only to discover when I tried to reconnect the chain that it wouldn't go back in. Turns out the pin was only supposed to be pushed through the outer plate enough to allow to inner plate to slide out. With the help of an assistant I was able to get the pin back in the outer plate, but it was really difficult.

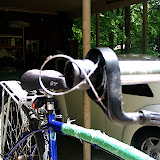
Friday, July 11, 2008

Bike Overhaul (Step 1)


The plan is to remove some high-quality components from an old mountain bike that someone donated to Steph (but is too small for her) and replace the cheap components on my mountain bike with them.

Time: 1 hour

Cost: $50 (for a set of specialty bike tools)

Witch-gear: Repair stand, crank puller, headset wrenches, bike chain tool, allen wrenches, socket set, diagonal nose cutters, large adjustable wrench, WD-40

Level of Difficulty: (What's with the saws?)

What I Learned: Taking the components off of a bike requires several specialty tools. Performance Bike's Essential Tool Kit includes most of the things you'll need for a bike made in the past 10 years. The tools aren't of superior quality, but they get the job done, the price is better than even buying two or three of these tools separately, and I'm not going to use them that often anyway, so I consider it a good value.

Sunday, May 4, 2008

Bike Gear Shifter

bike gear shifter

Steph currently commutes to work on Kate's old Specialized hybrid bike. Since she started riding it, she's been complaining that it does not shift gears. (Apparently Kate always stayed in the same gear when she was riding it.) After months of telling her she just wasn't shifting properly, I tried riding the bike this weekend and found that, even though the shifter knob on the handlebar could be moved around, the rear derailleur was not responding at all! (Sorry, dear.) I assumed the cable was broken, but Steph and I eventually traced the problem all the way up to the shifter — a grip-style shifter that's ability to pull the cable was inhibited by a broken internal component.

Time: 2 hours

Cost: $40 for a new shifter

Witch-gear: Bike Repair Stand, Allen Wrenches, Screwdrivers, Wrenches

Level of Difficulty: (What's with the saws?)

What I Learned: The cable inside a grip-style shifter is routed inside of it in a very complicated manner, thus the cable comes pre-installed in a grip-style shifter. Also, I learned how to adjust the derailleurs from "Bike Tutor" videos about the front and rear systems.

Monday, December 17, 2007

Crate Mounting System/Repair Stand for Bike


Now that I’m using a bike as a semi-primary vehicle, I needed: a) a way to attach a storage crate to the rear rack that was sturdy enough to handle a few bags of groceries, but easy to remove when I didn't require the carrying capacity or want the extra bulk (bungees weren't cutting it) and b) a means of holding the bike stably with the wheels a few feet in the air to perform maintenance and repair tasks on it.

For “problem a,” I decided to try drilling three strategically-placed holes in my rear rack and using three bolts with large fender washers and wingnuts to fasten the crate down when I need it. For “problem b,” I decided to build this PVC Bench-Top Stand.

Time: 5–6 hours (total)

Cost: ~$40.00 at Lowe’s and Ace (total)

Witch-gear: Cordless drill/various bits, Center punch, Hacksaw, Ratchet/driver set, PVC primer and cement

Level of Difficulty:
(What's with the saws?)

What I Learned: The crate solution is working great, but I’m not sold on this bench-top PVC repair stand. Though the feedback on Instructables was mostly positive, I’ve found the bending and wobbling to be a real problem whenever anything heavier than my super-light cyclocross bike is put on it. Also the 1/4" PVC recommended for the clamp barely makes it around the diameter of some of the bike frames I’ve used to test it (even with the foam insulation taken out of the middle).