Showing posts with label carpentry. Show all posts
Showing posts with label carpentry. Show all posts
Tuesday, September 16, 2008

Thursday, July 3, 2008
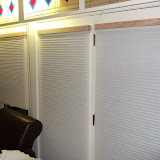
Living Room Shades
 |
| Living Room Shades |
New shades for the living room. Oak flooring was cut, glued and clamped into blocks to mounts these on.
Time: 2 hours
Witch-gear: Table saw, drill, countersink
Level of Difficulty:
 (What's with the saws?)
What We Learned: Cheap oak flooring is awesome. It has lots of uses and doesn't look bad.
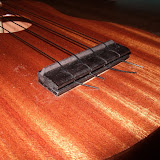
Ukulele
 |
| Uke |
A Ukulele kit for Kate's arrival home. Now we can all play. A kit from grizzly.com.
Time: 10 hours
Cost: $25
Level of Difficulty:
 (What's with the saws?)
What I Learned: Rubber bands can make good clamps.
Saturday, March 15, 2008
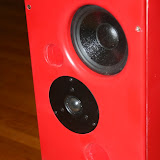
Speakers 2
 |
| Speakers 2 |
Another set of speakers here. I really like building speakers, I can't help it. I built them pretty much the same way as these. This set of speakers are a 3-way setup with an active crossover, and they're red!
Time: 1 month
Level of Difficulty:
 (What's with the saws?)
Saturday, February 9, 2008
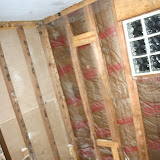
Bathroom Rebuild 2
 |
| Bathroom Rebuild |
 |
| Bathroom Rebuild 2 |
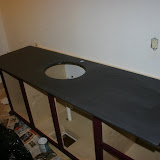
Months have gone by now and we are still working on the bathroom. We've been making lots of progress which you can see in the photos. We've been posting so many pictures that we went over the 500 photo limit in the first album. A second album named Bathroom Rebuild 2 has been created. Check it out.
Time: 1/2 year
Cost: O
Witch-gear: Purchases to make this project easier: Table saw, Tile saw, Paint sprayer
Level of Difficulty:
 (What's with the saws?)
What I Learned: Plan Ahead.
Monday, November 26, 2007
Bathroom Remodel
|
| Bathroom Rebuild |
First came the dripping down in the laundry room when anyone took a shower upstairs--which Bob always blamed on everyone--Kate in particular--not closing the shower door properly. So on it dripped. Then came the dark spots in the hardwood floors in the front hall where water was wicking in from the bathroom wall. Then came the repeated black stains on the shower tiles and the squishy spot in the floor by the tub. It was definitely time for bathroom repairs. And why go halfway when you can strip something down to the studs? This will be LONG project...stay tuned.
Time: many, many hours over an indeterminate span of time.....?
Cost: One arm, one leg...perhaps a firstborn...
Witch-gear: All of it, and perhaps some "necessary" new purchases?
Level of Difficulty:
(What's with the saws?)What I Learned: So far...that old tile and backer board is very heavy and hard to dispose of. That things always take MUCH longer than you anticipated they would. That you should plan BEFORE you start as some things may take weeks to track down or special order.
Tuesday, October 30, 2007
CD Dividers
 |
| CD Dividers |
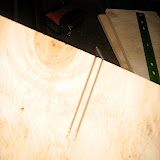
I wanted to make some CD dividers for Steph and I's Ikea Billy bookshelf. They sell something just like this (sadly, it's not my clever idea), but I knew it would be quicker and cheaper to just make them here, rather than drive four hours to the nearest Ikea, or order them and pay for the shipping.
Time: 3 hours
Cost: $12.50 (half the cost of a full sheet of nice plywood) at Lowe's.
Witch-gear: 10" Tablesaw, Bandsaw, Drill Press with a 1/2" forstner bit
Level of Difficulty:
(What's with the saws?)What I Learned: You cannot adjust the height of the third shelf on an Ikea Billy bookshelf. It is fixed in place (for stability, I'm guessing). I knew this at one time, because I put the self together, but I had forgotten and just made all three of the CD dividers an arbitrary height, figuring I'd adjust the shelves to fit. Turns out I should have measured the available space and divided it into thirds. I got the dividers home from the family workshop and found out 5/8" had to be taken off each unit for them to fit one-each on the top three shelves.
Sunday, October 21, 2007
Finishing Touches
 |
| Finishing Up Photos |
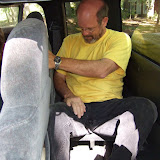
Project: We finished the handrail for the deck, put molding around the microwave, put in a shelf that fits behind a desk, built and installed a dog gate and built a second desk shelf.
Witch-gear: Tablesaw, chopsaw, drill, wood working tools
Time: Weekend
Expense: $50 $25 for plywood, $25 for 2X4s
Friday, October 12, 2007
Shed Fix Up
 |
| Shed Fix Up - Photos |
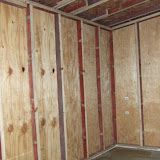
Fixing up the shed in the back of Mom and Dad's house. Building shelves to hold 24 Rubbermaid Roughnecks (432 total gallons of junk storage!) Also, fixing the broken switch for the light fixture and adding another light on the far end of the shed.
Time: 3 hours
Cost: N/A
Equipment/Tools Used: Craftsman Chop Saw. Craftsman Circular Saw, 2 Dewalt Cordless Drills
Level of Difficulty:
(What's with the saws?)Wednesday, May 9, 2007
Playhouse Teardown
 |
| Playhouse Teardown Photos |
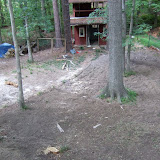
The playhouse that we built after moving to North Carolina we practically lived in as children. For almost 10 years it served as junk storage and began rotting. We took a few days, hired a dumpster, broke it down and said our goodbyes to our beloved playhouse.
Time: 2 days
Cost: $300 for dumpster
Equipment/Tools Used: Sawzall, hammers, sledges, and other demolition tools.
Level of Difficulty:

Sunday, March 18, 2007
Garage Cleanup
 |
| Garage Photos |
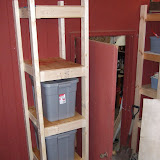
I took a few days to clean up the garage area. Built and rebuilt shelves. Organized tools. It's nice and clean. I know this won't last.
Time: 10 hours
Cost: $0 Used all scrap wood and paint.
Equipment/Tools Used: Craftsman 10" Tablesaw, Dewalt drill, Craftsman air nailer, hammers and prybars
Level of Difficulty:
(What's with the saws?)
Sunday, January 7, 2007
Desk with Shelf
 |
| Desk with Shelf Photos |
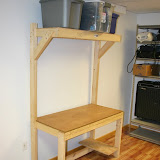
I wanted more storage and I needed a desk so I decided to make a desk with an overhead shelf. I originally wanted this desk to have two deep shelves, but at 8 feet tall I really overestimated the height of my ceiling and the center of gravity a little to high and forward. The final shelf has one shelf capable of storing 3 roughneck rubber maids worth of junk!
Time: 2 hours
Expense: $20 of wood
Equipment/Tools Used: Dewalt drill, Craftsman Chopsaw
Level of Difficulty:
(What's with the saws?)
Thursday, December 28, 2006
Room Rebuild
 |
| Room Rebuild Photos |
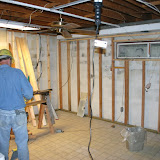
Oh no, mold! After looking behind the wall and discovering mold in this room, we had to rebuild a large portion of this room. The drywall was removed and after sealing the bricks with waterproof cement and paint, we replaced some framing and put in new drywall, electrical outlets, lights, ceiling fan, ceiling tiles, and flooring. It's like a brand new room!
Time: 1 week
Cost: $1500
Equipment/Tools Used: RotoZip (new tool!), drill, hammers,... you name it!
Level of Difficulty:
(What's with the saws?)
Thursday, June 8, 2006
Speakers
 |
| Speakers Photos |
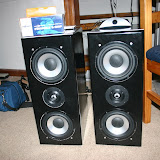
I wanted to do something that I thought Bob and Steph would both enjoy for a wedding present. They both like music... sooooo speakers. After researching different styles of speakers and different drivers, I decided to go with a design that was relatively compact, but also had a great range of frequencies. The cabinet for the speakers took a long time to figure out how to build and paint. The finish took two tries, but It turned out nice and shiny. The crossover was simple to assemble. They sound great too!
Time: 2 months
Equipment/Tools Used: Table saw, Router, drill, screwdriver, soldering iron, sandpaper
Level of Difficulty:
(What's with the saws?)
Subscribe to:
Posts (Atom)