Now that I’m using a bike as a semi-primary vehicle, I needed: a) a way to attach a storage crate to the rear rack that was sturdy enough to handle a few bags of groceries, but easy to remove when I didn't require the carrying capacity or want the extra bulk (bungees weren't cutting it) and b) a means of holding the bike stably with the wheels a few feet in the air to perform maintenance and repair tasks on it.
For “problem a,” I decided to try drilling three strategically-placed holes in my rear rack and using three bolts with large fender washers and wingnuts to fasten the crate down when I need it. For “problem b,” I decided to build this PVC Bench-Top Stand.
Time: 5–6 hours (total)
Cost: ~$40.00 at Lowe’s and Ace (total)
Witch-gear: Cordless drill/various bits, Center punch, Hacksaw, Ratchet/driver set, PVC primer and cement
Level of Difficulty:  (What's with the saws?)
What I Learned: The crate solution is working great, but I’m not sold on this bench-top PVC repair stand. Though the feedback on Instructables was mostly positive, I’ve found the bending and wobbling to be a real problem whenever anything heavier than my super-light cyclocross bike is put on it. Also the 1/4" PVC recommended for the clamp barely makes it around the diameter of some of the bike frames I’ve used to test it (even with the foam insulation taken out of the middle).
Monday, December 17, 2007
Crate Mounting System/Repair Stand for Bike

Friday, December 7, 2007
Monday, November 26, 2007
Bathroom Remodel
 |
| Bathroom Rebuild |
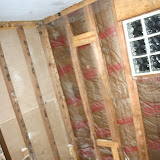
First came the dripping down in the laundry room when anyone took a shower upstairs--which Bob always blamed on everyone--Kate in particular--not closing the shower door properly. So on it dripped. Then came the dark spots in the hardwood floors in the front hall where water was wicking in from the bathroom wall. Then came the repeated black stains on the shower tiles and the squishy spot in the floor by the tub. It was definitely time for bathroom repairs. And why go halfway when you can strip something down to the studs? This will be LONG project...stay tuned.
Time: many, many hours over an indeterminate span of time.....?
Cost: One arm, one leg...perhaps a firstborn...
Witch-gear: All of it, and perhaps some "necessary" new purchases?
Level of Difficulty:
 (What's with the saws?)
What I Learned: So far...that old tile and backer board is very heavy and hard to dispose of. That things always take MUCH longer than you anticipated they would. That you should plan BEFORE you start as some things may take weeks to track down or special order.
Sunday, November 11, 2007
In Progress Treeskirt
 |
| In Progress Tree Skirt |
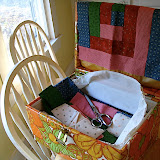
This treeskirt is a wedding gift for my good friends Megan and Brian. They got married April 22, 2006. -I guess I am a little behind. I've made this pattern once before for myself and since Megan liked it so much I wanted to make her one. I am off to a great start and am posting about my unfinished project to provide myself with the personal pressure to keep up and finish it. I would really like to have this to them in time to use this December. My dear Mum has promised to quilt it for me if I can make sure to have the piecework done by Thanksgiving. Wish me luck! I will post later with pictures of the completed project.
Time: I'll let you know once I am done.
Cost: a secret since it is a gift.
Witch-gear: cotton fabric, rotary cutter, clear quilting ruler, and a strong desire to have Megan & Brian put up a Christmas tree.
Level of Difficulty:
(What's with the saws?)What I Learned: That progress speeds up rapidly when I just have everything set up and ready to go. I am sneaking in a little work here and there. For example, I can sew a little in the morning while I wait for my turn to use the shower.
Wednesday, November 7, 2007
The Handmade Market
 |
| Handmade Market |
The Handmade Market is put on to provide the triangle community with a chance to shop for goodies made with tender loving care by vendors from all over. I have participated several times before and it usually involves working on stuff right up to the last minute. My usual wares are handmade cards. I start out by first creating a series of collages. Next my dear husband scans the originals for me and we have prints made. I then sew each print on to a blank card with my sewing machine.
Time: many hours over several evenings after work
Cost: N/A
Witch-gear: bits of paper, stickers, pencils, paints, boxes of blank cards from Michaels, Kenmore sewing machine, Yes! paste, and a trusted x-acto kinfe.
Level of Difficulty:
(What's with the saws?)What I Learned: I need to come prepared with enough cards to restock my suitcase as the day goes on. Luckily, there were lots of cards sold but by the end of the day this resulted in the table looking sadly empty. Also I should start working on stuff earlier.
Monday, November 5, 2007
Buick Tune-Up
 |
| Buick Photos |
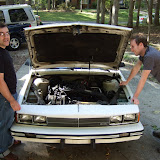
Kevin and I helped our friend Brian change the spark plugs, wires, oil, and air filter on his 1986 Buick Century (Custom!)
Time: 3 hours
Cost: ~$40 at Advanced Auto and Autozone.
Witch-gear: Standard mechanics tools set, additional extenders and universal joints, torque wrench, dielectric tune-up grease, graphite grease
Level of Difficulty:
(What's with the saws?)What We Learned: As a general rule, it is not worth the time and effort needed to change the internal fuel filter on a 1986 Buick Century Custom.
Battery Pack Rebuild
 |
| Battery Pack Rebuild 2 Photos |
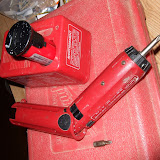
This Milwaukee cordless driver was at one time a very handy tool. When the battery pack lost its charge it wasn't as useful. New battery packs tend to be expensive and hard to find so I cracked this one open and put in a few new cells.
Time: 0.5 hours
Cost: $2.69 for two new 2600 mAH NiCd batteries
Witch-gear: 30W soldering iron
Level of Difficulty:
(What's with the saws?)
Subscribe to:
Posts (Atom)