
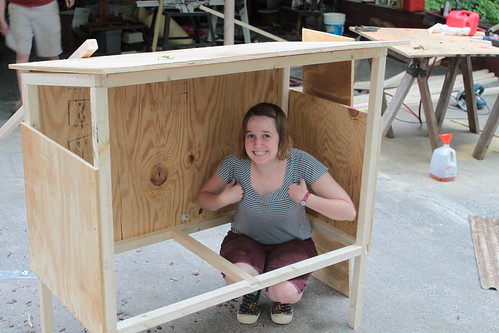
The pantiltinator is an ongoing project which pans, tilts, shuttles, or in other ways moves a camera, most likely for a timelapse application. (pan-tilt-inator)
Pantiltinator 1.0 was a device which would produce a circular pan. It was used for the "Cut your Hair" ukulele cover video on youtube. HERE!!!!
Pantiltinator 2.0 was a device which raised the camera from 2 feet off the ground to about 11 feet off the ground. Although neither a pan or tilt, the name is still used. It was used for the "War on War" timelapse sidewalk caulk ukulele cover video. HERE!!!!
Important Supplies:
Pantiltinator 1.0:
-Wheel hub with bearing
-3/4" PVC arm
-bucket to hang weights
-mini tripod to tape to the other end
Pantiltinator 2.0:
-12 foot board (wanted to go 16 feet, but the board looked scary high)
-other 2x4's
-packaging tape
-sliders
-wooden pulley, and metal pulleys
-string and spring(bungee)
Electronics for Both
-stepper motor (from all-electronics)
-arduino (from sparkfun)
-stepper motor driver (from sparkfun)
Links to Pantiltinator 2.0 photos
ByrnnB's
Katians
Bob's
Bliss
Link to Pantiltinator 1.0 photos
Kevin
Thursday, July 9, 2009
Pantiltonantor 2.0
Tuesday, June 9, 2009
S-10 O2 Sensor

After the "service engine soon" light came on in the S-10 and finding the P0139 code with the scan gauge, the O2 sensor was replaced.
The old one was removed and the new one was spliced on using the included kit.
Friday, June 5, 2009
S-10 Alternator
 We changed the alternator in the truck.
Process: As the Chilton book says:
Remove negative battery cable.
Remove alternative.
Install new alternator.
Link to the photos:
http://www.flickr.com/photos/kevinwitchger/sets/72157619215108541/
Friday, May 29, 2009
Friday, May 22, 2009
Round and Round you go!
Kate and I did yet another video.
Process: Dad and I made a device that rotated the camera around a point... very slowly around a point. I then screwed it to the living room ceiling with four 3" drywall screws and had Kate cut my hair under it while it was running.
Photos of the device:
http://www.flickr.com/photos/kevinwitchger/sets/72157619025976363/
Process con'd: Kate and I then recorded a song that had to do with cutting hair (which was acutally harder to find than I expected). Then we recorded our heads and kate decided that creepy floating heads were better than heads on a white wall. I agree.
Youtube video:http://www.youtube.com/watch?v=EWAcEviGHUs
Sunday, May 10, 2009
Bucket Planters

We made some bucket planters for Mom for Mother's day.
Process: We took some old blue bucket halfs and cut a plywood base for them, painted, filled with dirt, and planted some tomates, peppers, and herbs.
Link to the photos:
http://www.flickr.com/photos/rwitch80/sets/72157618003188385/
Saturday, May 9, 2009
Strawberry Beer
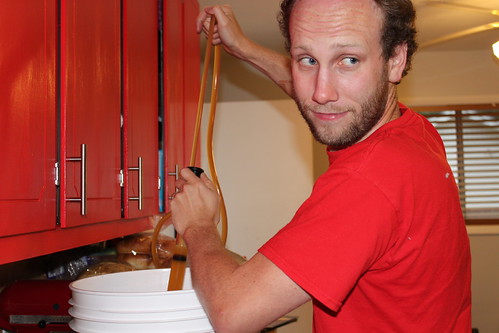
Bob made some strawberry beer for Kate's Birthday.
I give it a thumbs up!
Link to the photos:
http://www.flickr.com/photos/rwitch80/sets/72157618003586057/
what are fight parties anyway?
5 second fight party is a ridiculous sequel to the 5 second party series.
Process: This video involved walking around all parts of Raleigh and setting up the camera, operated by Bonnie, and acting out a slow motion fight sequence. Then a ridiculous song was recorded, involving lots of screaming and distortion. Finally, it was mixed in Final Cut. Waste of time you say???... i think not.
The video on Youtube: http://www.youtube.com/watch?v=CbhlsPLFzv8
Recording fight party song: http://www.flickr.com/photos/katian/sets/72157617809916912/
Saturday, April 25, 2009
Bob's Fence

Happy B-day bob. Here is a fence. A red fence.
Process: Kate found some great fencing for free on craigslist. thank you craigslist. We then made some frames out of 1x2 and painted it with some on clearance red paint.
Light weight, modular fencing... and most importantly red.
Link to Photos:
http://www.flickr.com/photos/kevinwitchger/sets/72157619025951753/
Wednesday, April 22, 2009
Bob is planting
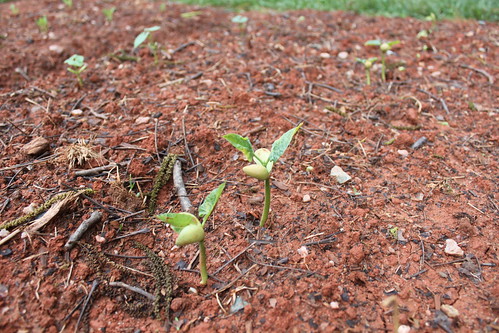
Bob has planted many things in his garden. maybe he will tell you what.
links to photos:
http://www.flickr.com/photos/rwitch80/sets/72157618003783533/
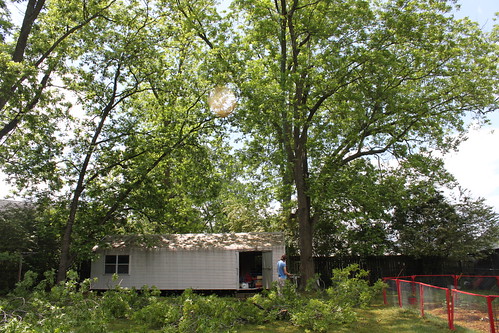
He even had the tree trimmed so more light could get to his plants:
link to photos
http://www.flickr.com/photos/rwitch80/sets/72157618297938440/
Sunday, April 19, 2009
Bob's Garden
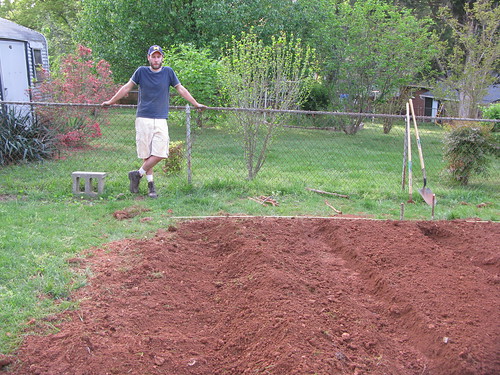

Bob did some gardening.
Here are some links to the double digging and tilling photos:
http://www.flickr.com/photos/rwitch80/sets/72157616928326925/
http://www.flickr.com/photos/katian/sets/72157616861816203/
Sunday, March 8, 2009
Tuning Pianos

Tuned the pianos. And bob's new piano.
Process: Using the trial of piano tuner 1.7 and a tuning hammer, the piano were tuned. I learned you must tune them several times if they are way off... and tuning a piano takes a long time.
Wednesday, February 18, 2009
Happy Windows
http://www.flickr.com/photos/brynnb/sets/72157614041613323/
If we suddenly hit the Powerball jackpot my first act (well, after helping my kids erase their student loans) would be to hire a tribe of artisans to work on every aspect of my house. I’d want everything stain-glassed, wood-worked and ceramitized. But since we do not have the wherewithal to become patrons of the arts, we must make do.
The celestory windows over the closet in our bedroom have been a source of irritation for a long time. We’d gotten into the terrible habit of parking junk up there (suitcases, the big bowls from Bob and Steph’s wedding we didn’t know what to do with, Bob’s hatboxes, a Rubbermaid tub or two of off-season clothes). It looked junky from the inside, and even worse, you could see it from outside when our lights were on.
I decided to do a faux stained glass treatment.
Bob cut me four pieces of Plexi-glass the exact size of the panes of glass (or as we like to say in the Witchger household “more-or-less” the size of the panes).
I drew up a pattern–an homage to Frank Lloyd Wright–and marked each section as to whether I wanted it clear, textured or milky-white.
Leaving the plexi-glass on the pattern I first cut away the protective plastic in the areas I wanted frosted and peeled it off, using the remaining plastic as a masque and spray painted those with aerosol stained-glass paint. When that had dried I pulled off the rest of the protective plastic and “drew” on the fake leading which I’d purchased in plastic squeeze bottles and let that dry overnight.
The next day I filled in each secton according to the opacity I’d assigned it and let it dry for 48 hours.
Bob then installed the panes right over the old glass using glazing points. When we get tired of them we can just take them down. But right now I like how they look, especially when the sun streams in late in the afternoon. I think this will be the motivation we need to keep the junk from gathering up there again. Now the only question is where do we put it all if Kate needs to use her old room again?
Lessons learned:
This can’t be rushed--a fan pushes the stained glass paint to one side so that you get a leeward effect.
The paint needs to dry absolutely flat-it has a high viscosity, but after hours it will run and if you don’t catch it in time it will overrun the “leading”.
Supplies:
Thin Plexi-glass
Fake “leading” for stained glass from the craft store
Stained glass “paint” in clear and frosted
Elmer’s glue (the cheaper the better, I used three bottles that were 25¢ each during the back-to-school sales) for the white milky sections.
Glazing points
A screwdriver for pushing the glazing points into the molding
Monday, January 26, 2009
S-10 Clutch
Gallery link:
We replaced the clutch in the family S-10. If you remember, we already replaced the master cylinder, but that didn't solve the problem. The clutch gave out and we had to push it into the drive in order to work on it.
Bob, Dad and I took two days and replaced the clutch.
WITCH-GEAR:
- Craftsman sockets (broke a universal joint, lifetime warranty!)
- Universal 3/8" drive joints (tight spots around the transmission)
- 18mm allen (made out of a bolt, an 18mm wrench and tape)
- Jack
- Jack stands (bricks)
- Straps
- ratcheting come-along
- 3 cameras
SAWZALLS: 4.5
TIME: 8 hours the first day, 4 hours the second
WHAT I LEARNED:
Replacing the clutch in this truck is a lot of work. The tolerances around the transmission are tight so removing it and getting it back in is tricky.
s-10 clutch, chevy s-10, s10, s-10, Chevrolet s-10, Chevrolet s10, clutch master cylinder